Show Grok
Windows. Own window. For people who have an idea and little developer skill.
What it is
Show Grok is a helper that sits beside Grok (AI). It asks you leading questions. You answer in plain words. Show Grok turns those answers into a file. You paste that file into Grok.
Every time you send a file, Grok sends back a mockup for you to look at. You do not have to guess what to type.
A small look at Create an Application
These four pictures are one path only — Create an Application. The same helper works for a letter, a CV, a form, a website, or something else. The questions change with the kind you pick. This is a short look, not the whole app.
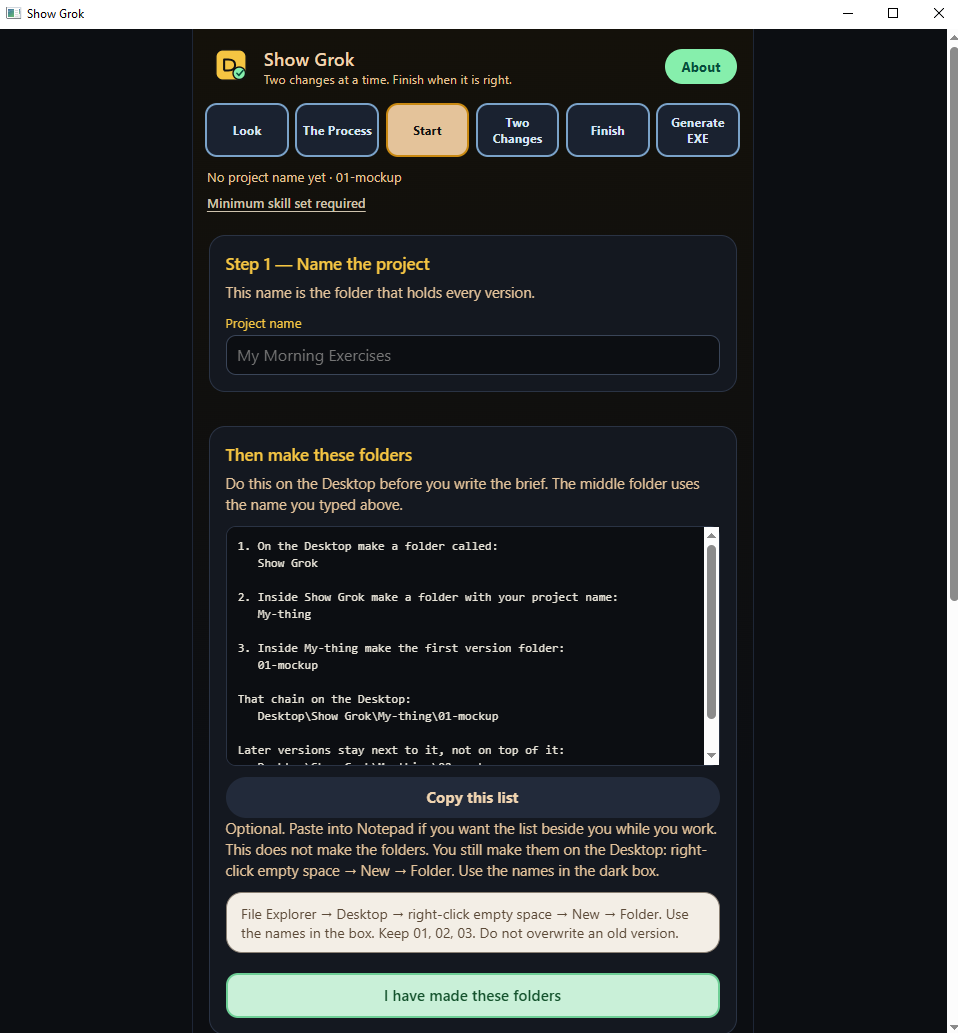
Picture 1 — Name it and make the folders. You type a project name. Show Grok writes the folder list: Desktop → Show Grok → your name → 01-mockup. That first folder is where Grok’s first mockup lives. Later mockups sit beside it as 02-mockup, 03-mockup. Nothing is overwritten. The app does not make the folders for you. It tells you the names so you cannot lose a version.
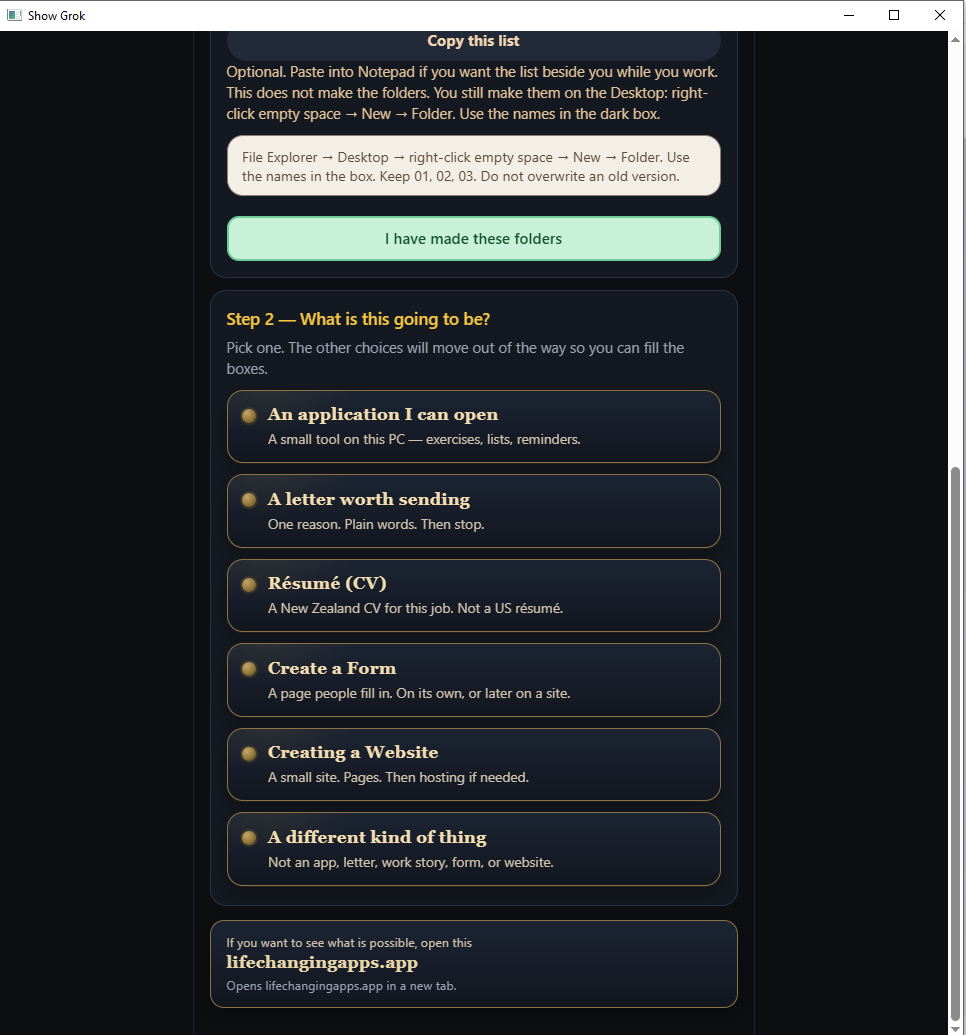
Picture 2 — Pick the kind of work. Six cards. Here we have chosen Create an Application so you can see how the helper behaves. The other five cards stay available. Pick one. The rest move out of the way.
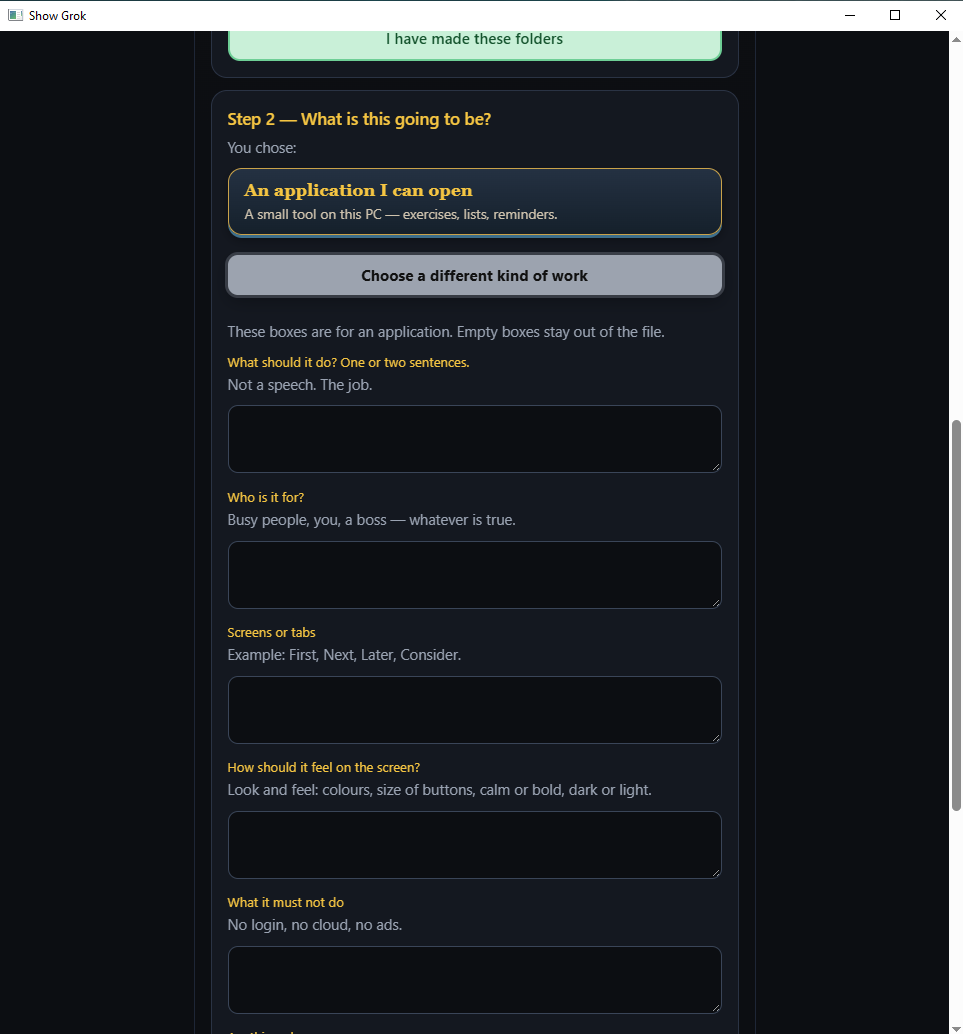
Picture 3 — Leading questions. After you pick Create an Application, Show Grok asks short questions: what should it do, who is it for, which screens, how should it feel, what it must not do. You are not staring at a blank Grok chat. Empty boxes stay out of the file. These answers become the first file you paste into Grok. Grok then sends a mockup into 01-mockup for you to review.
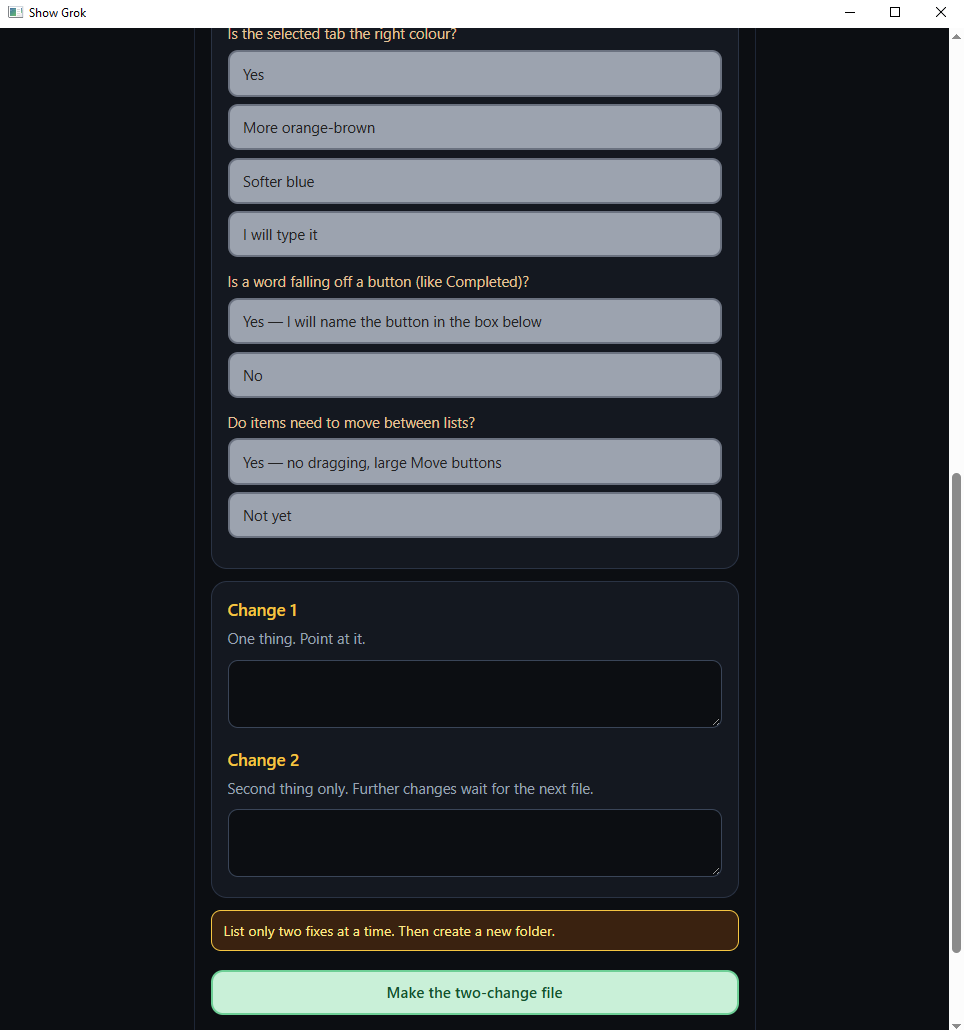
Picture 4 — Two changes only. You look at the mockup. Show Grok asks a few pointed questions, then two boxes: Change 1 and Change 2. That is the next file for Grok. Grok sends a new mockup. You put it in a new folder. Repeat until you are satisfied. Then Finish. If this is an application, Generate EXE shows how to ask Grok for a Windows installer, or for phone install steps.
Six kinds of work
- Create an Application
- A letter worth sending
- Résumé (CV)
- Create a Form
- Creating a Website
- A different kind of thing
How the mockups work
- Pick one kind of work. Show Grok gives you leading questions for that kind. Answer what you can. Leave a box empty if you do not know.
- Copy the file Show Grok writes. Paste it into Grok.
- Grok sends a mockup zip. Put it in folder 01-mockup. Open it. Look at it.
- You may ask for only two changes. Show Grok writes those two things into a new file. Grok sends a new mockup. That zip goes in 02-mockup. Do not overwrite the old folder.
- This repeats — two changes, new folder, new mockup — until you are satisfied and no further changes are required.
- Open Finish. Say this version is good enough.
When you are finished
If you made an application, Show Grok has a Generate EXE tab. It tells you how to ask Grok, step by step, for a Windows installer you can put on a PC.
If you want the same work on a phone, ask Grok for a step-by-step to make a file you can install on a phone. Show Grok does not put apps on Google Play or the App Store by itself. Phones do not run a Windows .exe.
A letter, a CV, a form, or a website does not need an installer. Finish is enough.
What it is not
Show Grok does not compile the .exe inside itself. Grok builds the mockup. You stay in control of the two changes. Nothing leaves this PC unless you paste a file into Grok.
Windows — NZ$3
One-time. No subscription. NZ$1 from this sale is held for charity.
Buy Show Grok — NZ$3Opens Stripe. After payment you download the installer.